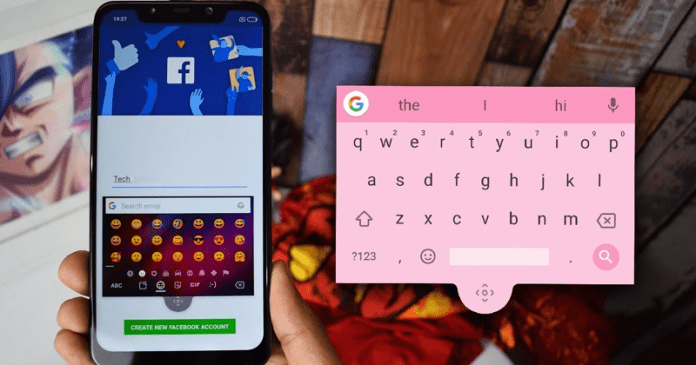

We all know very well that Google has put all the good and interesting functions and features on its well-known keyboard application, of course, undoubtedly I am talking about the Gboard. Hence, today here we will simply discuss about an interesting tutorial, yes, we will show you how to enable the floating keyboard mode in the tech giant Google’s Gboard.
How To Enable The Floating Keyboard Mode In Google’s Gboard?
We all know very well that Google has put all the good and interesting functions and features on its well-known keyboard application, of course, undoubtedly I am talking about the Gboard.
But, today here we will talk about an interesting feature that you can do in the tech giant Google’s well-known keyboard application, of course, Gboard. Yes, I am talking about the “floating keyboard”, it is a really interesting feature that anyone can enable it to simply enjoy on any Android device.
So, for this, the first thing you have to do is download the tech giant Google’s well-known keyboard application, of course, Gboard from the Play Store. Is this app is paid? No, don’t worry about that, as it is a completely free application and not only that even it is one of the most recommended options for all those users who are looking for an alternative keyboard.
Also Read: Top 25 Best Keyboard Apps For Your Android Smartphone
How to use the floating keyboard on any Android device?
If you have already installed and configured the tech giant Google’s well-known keyboard application as your primary or default keyboard on your Android device then simply follow the steps mentioned below:-
- First of all open any application you can write in (example- note app).
- Now simply open the keyboard on your device.
- Now simply press the G icon that appears in the upper left area of the keyboard.
- Now a menu of options will be displayed.
- Now simply select the three little dots on the right upper corner of the keyboard.
- Now after tapping that option, you will get four options “Text editing”, “One-handed”, “Settings” and “Floating”.
- Now to use floating keyboard simply you have to select the option “Floating”.
- That’s it now you will get floating keyboard on your Android device screen.
As just after selecting the option “Floating”, the keyboard will unpin from the lower area of your device screen, and you can simply move it to a position that is most comfortable for you. And to do this, simply you have to tap and hold the movable cursor icon below the keyboard and then drag it to your desired area.
Also Read: 15 Best GIF Keyboards for Android To Share GIFs With Ease
And not only that even you can also resize the keyboard from the four corners simply to make it smaller or bigger. However, if you want to leave it where it was, simply drag it down until the edge lights up blue.
Moreover, the functions and features of the floating keyboard are exactly the same as the “static” version. Basically, this extraordinary feature of Gboard can be very useful to navigate through certain websites or to write in certain apps in which the keyboard occupies a good part of the screen. So, what do you think about this? Simply share all your views and thoughts in the comment section below.


